Xamarin.Forms ローカルデータベース(SQLite)の利用
1. ローカルデータベース
Xamarin.Formsでは、SQLite.Netを使用することで、簡単にローカルのSQLiteデータベースが利用可能です。
今回は、このSQLite.NetをPCLで実装する方法について紹介します。
PCLで、このSQLite.Netを利用する場合、プラットフォーム固有の部分(最初の初期化)だけを、DependencyServiceで記述し、それ以外をPCLで実装する形になります。
※プラットフォーム固有の部分とは、主にデータファイルの場所を取得するあたりです。
※Xamarinのページでは、「Portable」と「Sharde」の2種類の実装方法が紹介されています。
2. NuGetパッケージのインストール
SQLite.NetはNuGetパッケージで簡単に利用が可能になっています。
「NuGet パッケージの管理」で 'SQLite.Net.PCL' で検索できます。
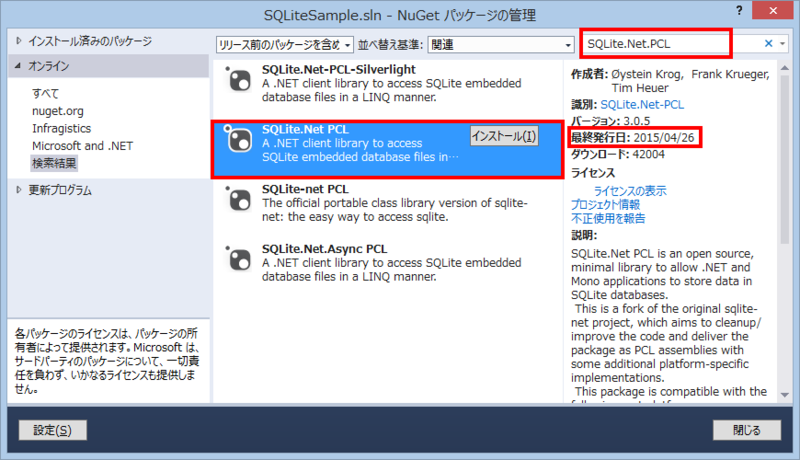
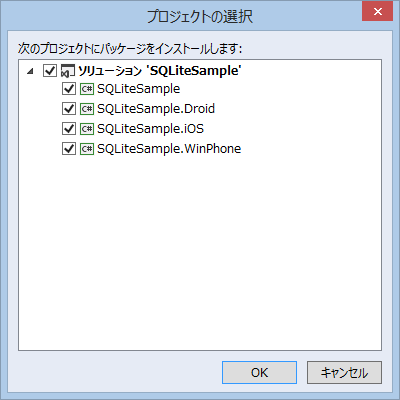
最初、うまく「SQLite.Net.Platform.Xamarin(Pratform)」が入らないな・・・と試行錯誤していたら、急にうまく行くようになって、よく見たら最終発行日が昨日になっていたw(途中で更新されたのですね)
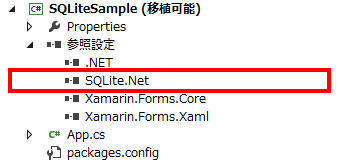
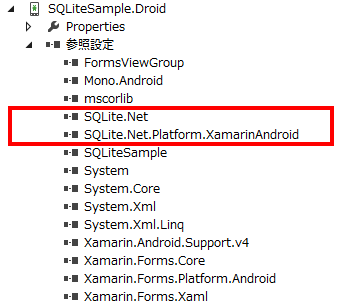
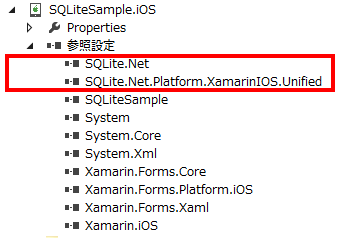
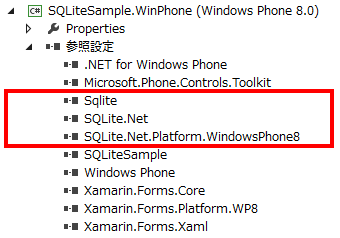
※WindowsPhoneの場合は、'SQLite.Net-PCL'の他に依存関係から'sqlite-net-wp8 3.8.5'もインストールされます。
3. インターフェースの定義
プラットフォーム固有の部分をDependencyServiceで記述するためのインターフェースを定義します。
PCLプロジェクトにISQLite.csを追加しました。
これは、SQLiteを初期化して、SQLiteConnectionのインスタンスを取得するものです。
//ISQLite.cs
using SQLite.Net;
namespace SQLiteSample{
    public interface ISQLite{
        SQLiteConnection GetConnection();
    }
}
なお、このインターフェースの利用例は、次のようになります。
db = DependencyService.Get<ISQLite> ().GetConnection ();
db.CreateTable<T>();
4. 各プラットフォームの実装
DependencyService用に定義されたインターフェースを各プラットフォームで実装します。iOS
iOSプロジェクトにSQLite_iOS.csを追加しました。using System; using System.IO; using SQLite.Net; using SQLite.Net.Platform.XamarinIOS; using SQLiteSample.iOS; using Xamarin.Forms; [assembly: Dependency(typeof(SQLite_iOS))] namespace SQLiteSample.iOS{ public class SQLite_iOS : ISQLite{ public SQLiteConnection GetConnection(){ const string sqliteFilename = "TodoSQLite.db3"; //データベース名 var documentsPath = Environment.GetFolderPath(Environment.SpecialFolder.Personal); //Documentsフ ォルダ var libraryPath = Path.Combine(documentsPath, "..", "Library"); // ライブラリフォルダ var path = Path.Combine(libraryPath, sqliteFilename);//DBファイルのパス var plat = new SQLitePlatformIOS(); var conn = new SQLiteConnection(plat, path); return conn; } } }
Android
AndroidプロジェクトにSQLite_Droid.csを追加しました。
using System.IO;
using SQLiteSample.Droid;
using Xamarin.Forms;
[assembly: Dependency(typeof(SQLite_Android))]
namespace SQLiteSample.Droid{
    public class SQLite_Android : ISQLite{
        public SQLite.Net.SQLiteConnection GetConnection() {
            const string sqliteFilename = "TodoSQLite.db3"; //データベース名
            var documentsPath = System.Environment.GetFolderPath

(System.Environment.SpecialFolder.Personal);//Documentsフォルダ
            var path = Path.Combine(documentsPath, sqliteFilename);//DBファイルのパス
            var plat = new SQLite.Net.Platform.XamarinAndroid.SQLitePlatformAndroid();
            var conn = new SQLite.Net.SQLiteConnection(plat, path);
            return conn;
        }
    }
}
WindowsPhone
WindowsPhoneプロジェクトにSQLite_WinPhone.csを追加しました。
using System.IO;
using Windows.Storage;
using SQLite.Net;
using SQLite.Net.Platform.WindowsPhone8;
using SQLiteSample.WinPhone;
using Xamarin.Forms;
[assembly: Dependency(typeof(SQLite_WinPhone))]
namespace SQLiteSample.WinPhone {
    public class SQLite_WinPhone : ISQLite{
        public SQLiteConnection GetConnection(){
            const string sqliteFilename = "TodoSQLite.db3";//データベース名
            var path = Path.Combine(ApplicationData.Current.LocalFolder.Path, sqliteFilename);//DBファイルの

パス
            var plat = new SQLitePlatformWP8();
            var conn = new SQLiteConnection(plat, path);
            return conn;
        }
    }
}
5. データクラスとデータベースへのアクセスクラスの作成
データクラス
本サンプルのデータクラスとして、PCLプロジェクトにTodoItem.csを追加しました。キーとなるIDのほかに、文字列を保存するText、作成日時のCreatedAt、そして、削除状態を表現するDeleteです。
using System;
using SQLite.Net.Attributes;

namespace SQLiteSample{
    public class TodoItem{
        [PrimaryKey, AutoIncrement]
        public int ID { get; set; }
        public string Text { get; set; }
        public DateTime CreatedAt { get; set; }//作成日時
        public bool Delete { get; set; }//削除フラグ(trueの時、表示しない)
    }
}
データベースへのアクセスクラス
データベースへのアクセスのための、PCLにTodoRepository.csを定義します。
実装したのは、一覧取得と、データの追加・更新だけです。
using System.Collections.Generic;
using SQLite.Net;
using Xamarin.Forms;

namespace SQLiteSample{
    class TodoRepository{
        static readonly object Locker = new object();
        readonly SQLiteConnection _db;

        public TodoRepository(){
			_db = DependencyService.Get<ISQLite> ().GetConnection ();//データベース接続
			_db.CreateTable<TodoItem>();//テーブル作成
		}
        //一覧
        public IEnumerable<TodoItem> GetItems(){
            lock (Locker){

                //Delete==falseの一覧を取得する(削除フラグが立っているものは対象外)
                return _db.Table<TodoItem>().Where(m => m.Delete == false);
            }
        }
        //更新・追加
        public int SaveItem(TodoItem item){
            lock (Locker){
                if (item.ID != 0){//IDが0で無い場合は、更新
                    _db.Update(item);
                    return item.ID;
                }
                return _db.Insert(item);//追加
            }
        }
    }
}
6. 画面実装とデータベースの利用
以上で、段取りは整ったので、画面とDBアクセスを実装します。
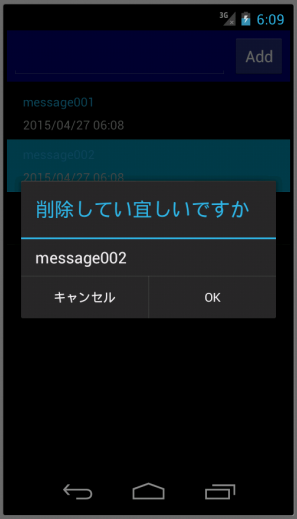
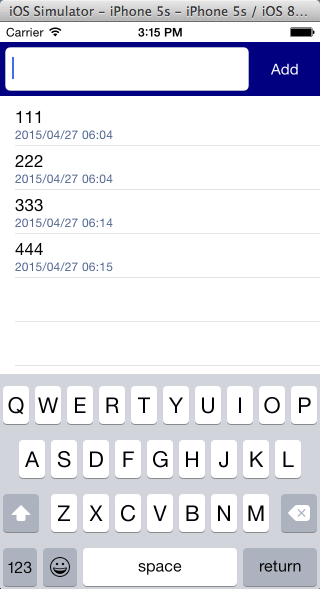
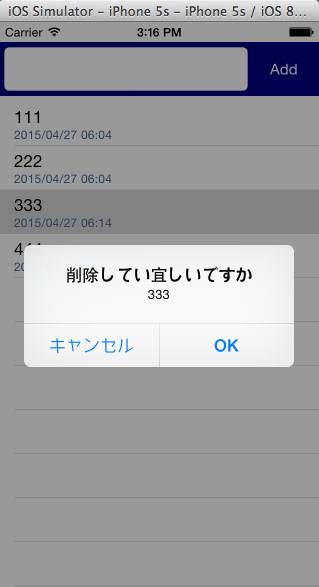
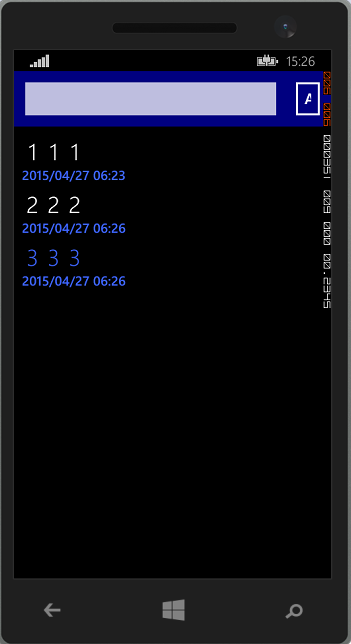
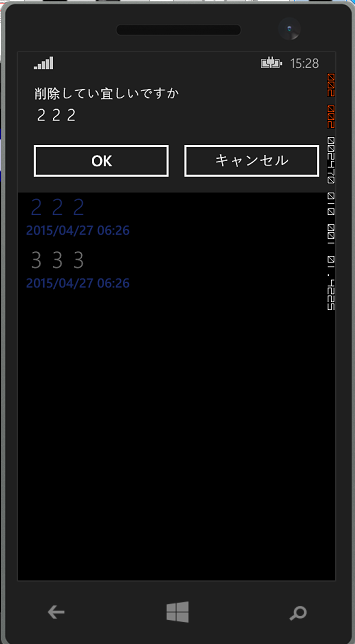
Addボタンで追加、リストのタップで削除になってます。
using System;
using Xamarin.Forms;
namespace SQLiteSample{
    public class App : Application{
        public App(){
            MainPage = new MyPage();
        }
        protected override void OnStart(){}
        protected override void OnSleep(){}
        protected override void OnResume(){}
    }
    class MyPage : ContentPage{

        readonly TodoRepository _db = new TodoRepository();

        public MyPage(){

            //データ表示用リストボックス
            var listView = new ListView{
                ItemsSource = _db.GetItems(),
                ItemTemplate = new DataTemplate(typeof(TextCell))
            };
            listView.ItemTemplate.SetBinding(TextCell.TextProperty, "Text");
            listView.ItemTemplate.SetBinding(TextCell.DetailProperty, new Binding("CreatedAt", stringFormat:

"{0:yyy/MM/dd hh:mm}"));
            listView.ItemTapped += async (s, a) =>{//リストがタップされた時の処理
                var item = (TodoItem)a.Item;
                if (await DisplayAlert("削除してい宜しいですか", item.Text, "OK", "キャンセル")){
                    item.Delete = true;//削除フラグを有効にして
                    _db.SaveItem(item);//DB更新
                    listView.ItemsSource = _db.GetItems();//リスト更新
                }
            };
            //文字列入力
            var entry = new Entry{
                HorizontalOptions = LayoutOptions.FillAndExpand
            };
            //追加ボタン
            var buttonAdd = new Button{
                WidthRequest = 60,
                TextColor = Color.White,
                Text = "Add"
            };
            buttonAdd.Clicked += (s, a) =>{//追加ボタンが押された時の処理
                if (!String.IsNullOrEmpty(entry.Text)){//Entryに文字列が入力されている場合に処理する
                    var item = new TodoItem { Text = entry.Text, CreatedAt = DateTime.Now, Delete = false };
                    _db.SaveItem(item);
                    listView.ItemsSource = _db.GetItems();//リスト更新
                    entry.Text = "";
                }
            };

            Content = new StackLayout{
                Padding = new Thickness(0, Device.OnPlatform(20, 0, 0), 0, 0),
                Children = {
                    new StackLayout {
                        BackgroundColor = Color.Navy,//入力部の背景色はネイビー
                        Padding = 5,
                        Orientation = StackOrientation.Horizontal,
                        Children = {entry, buttonAdd}//Entryコントロールとボタンコントロールを横に並べる
                    },
                    listView//その下にリストボックスを置く
                }
            };
        }

    }
}
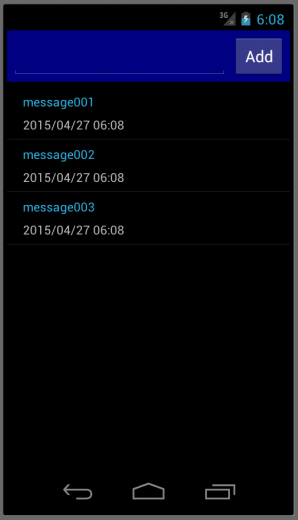
実行画面は次のとおりです。
 |
 |
 |
 |
 |
 |
7. WindowsPhoneの場合
以上で、Xamarin.FormsからSQLite.Netを利用する手順は終了なのですが・・・
WindowsPhoneは、デフォルトでSQLite自体がインストールされていないので、初めてのSQLiteを使用する場合は、このライブラリ自体をインストールする必要があります。そして、アプリ作成時は、このライブラリを参照に追加することになります。
以下、手順を追って説明します。
(1)ダウンロード
http://www.sqlite.org/download.html#wp8から、WindowsPhone8用のものをダウンロードします。
(2)インストール
ダウンロードした、vsixファイルを実行して、インストールします。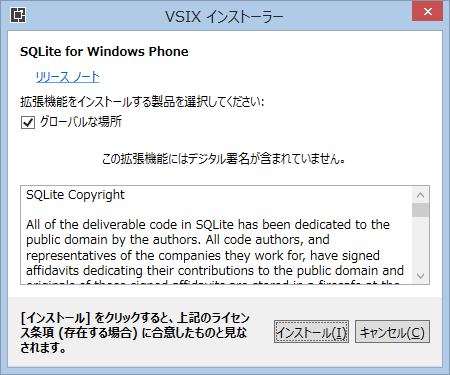
(3)VisualStudio再起動
参照の一覧に表示するためにVisualStudioの再起動が必要です。(4)参照追加
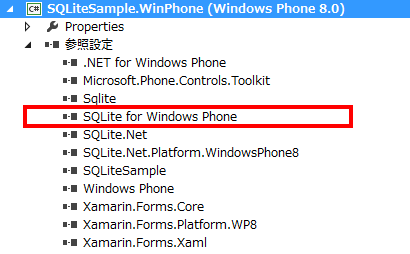
WindowsPhoneプロジェクトの参照の追加で「SQLite for Windows Phone」を追加します。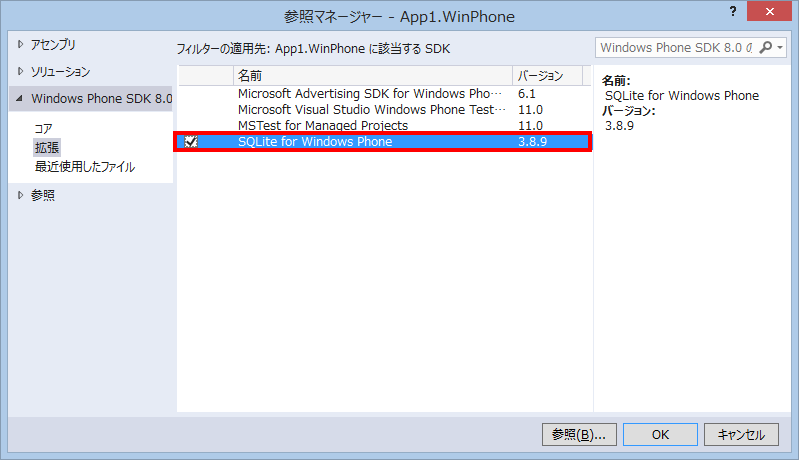
8. 参考にさせて頂いたページ
Xamarin.AndroidでSQLiteを使う - かずきのBlog@hatena
Working with a Local Database - Xamarin
↓サンプルはここに置きました。github.com