xamarin.iOS アラートダイアログ・アクションシート
1 アラートダイアログ

UIAlertView()でアラートダイログを表示できます。
var alert = new UIAlertView("タイトル", "メッセージ", null, "Cancel","OK");
alert.Show();

ボタンクリック時のイベントは、Clickedで取得できます。
UIAlertView()の第3パラメータで、クリックイベントを処理するクラス(UIAlertViewDelegate)を指定することも可能ですが、
イベント+ラムダで書いた方が、色々な意味で個人的に好きです。
var alert = new UIAlertView("タイトル", "メッセージ", null, "OK", new [] { "Cancel" });
alert.Clicked += (sender, args) => Console.WriteLine("{0} Clicked", args.ButtonIndex);
alert.Show();

タイトル、メッセージ、ボタンは、プロパティやメソッドでも指定可能です。
ボタンを2つを超えると縦に並びます。
var alert = new UIAlertView() {
    Title = "タイトル",
    Message = "メッセージ"
};
alert.AddButton("1");
alert.AddButton("2");
alert.AddButton("3");
alert.AddButton("4");
alert.AddButton("5");
alert.AddButton("6");
alert.Clicked += (sender, args) => Console.WriteLine("{0} Clicked", args.ButtonIndex);
alert.Show();
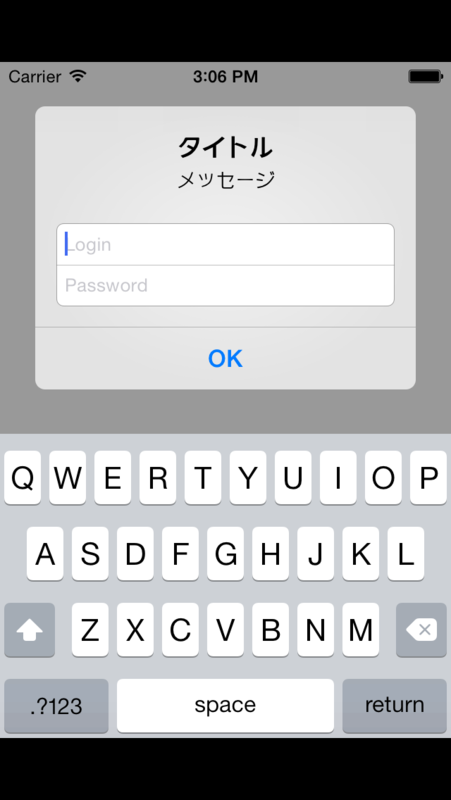
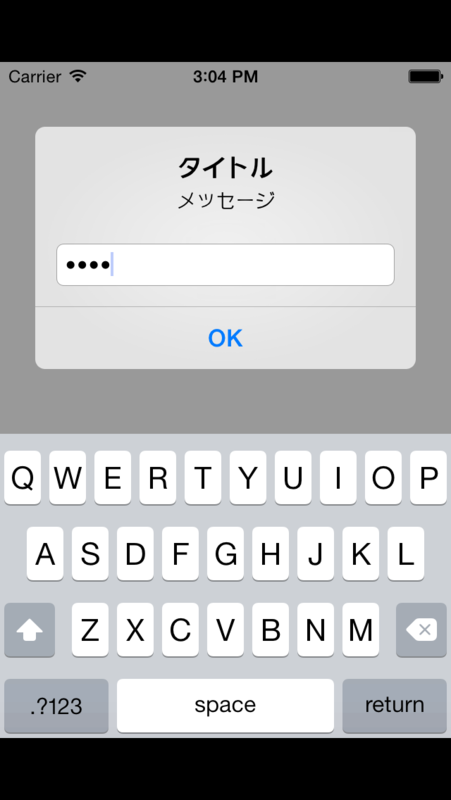
AlertViewStyleにスタイルを指定するだけで、下記の形のダイアログを作成できます。
(1)UIAlertViewStyle.LoginAndPasswrdInput
(2)UIAlertViewStyle.PlainTextInput
(3)UIAlertViewStyle.SecureTextInput


なお、テキストフィールドへの入力内容は、GetTextField(index)で取得できます。
var alert = new UIAlertView("タイトル", "メッセージ", null, "OK", null){
    AlertViewStyle = UIAlertViewStyle.LoginAndPasswordInput//スタイルの指定
};
//Loginとpasswordに入力されたテキストをGetTextField(n).Textで取得する
alert.Clicked += (sender, args) => Console.WriteLine(String.Format("login:{0} pass:{1}", alert.GetTextField(0).Text, alert.GetTextField(1).Text));
alert.Show();
2 アクションシート

複数の選択肢の中から1つ選択をさせたい時、UIActionSheet()が使用できます。
Clickedイベント時に受け取るButtonIndexは、ボタンの種類に関係なく、上から数えたインデックスとなります。
(図では、「メニュー1」が0、「メニュー2」が1、「キャンセル」が3です)
var actionSheet = new UIActionSheet ("タイトル", null, "キャンセル","メニュー1", new[]{"メニュー2","メニュー3"});
actionSheet.Clicked += (sender, args) => Console.WriteLine("{0} Clicked", args.ButtonIndex);
actionSheet.ShowInView(View);

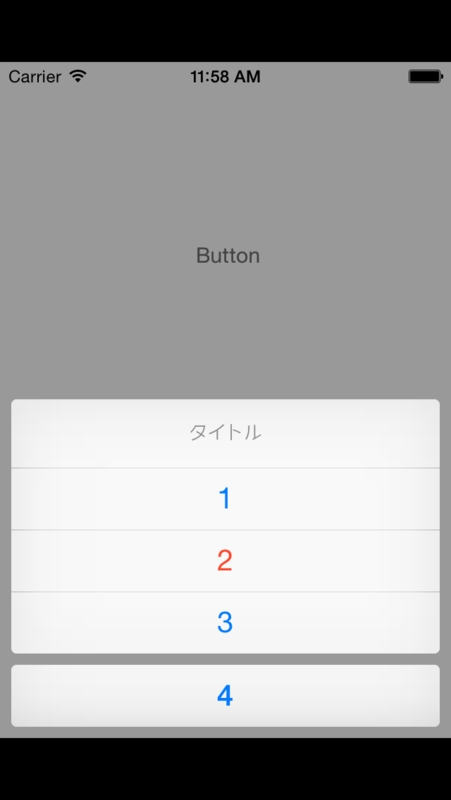
UIActionSheet()もプロパティやメソッドで記述できます。
DestructiveButtonIndexは、赤色表示するボタン位置、そして、CancelButtonIndexは、キャンセルボタンの位置指定です。(最後のインデックス以外を指定すると、ちょっと表示が違うようです)
var actionSheet = new UIActionSheet(){
    Title="タイトル"
};
actionSheet.AddButton("1");
actionSheet.AddButton("2");
actionSheet.AddButton("3");
actionSheet.AddButton("4");

actionSheet.DestructiveButtonIndex = 1; // 赤色で表示される
actionSheet.CancelButtonIndex = 3;  // 最後のインデックスを指定した場合スペースが挿入される
actionSheet.Clicked += (sender, args) => Console.WriteLine("{0} Clicked", args.ButtonIndex);
actionSheet.ShowInView(View);